
Tired of waiting for your hair to grow? Clip in hair extensions are the ultimate “hair hack” for instant length and mermaid like volume. Think of them as high heels for your hair they elevate your style and boost your confidence in minutes.
However, there’s an art to the application. To avoid a clunky, “obvious” look, you need a seamless blend. Whether you’re hiding a bad haircut or adding thickness, here is how to install your extensions like a pro for a natural, flawless finish.
Why Choose Clip In Extensions Over Other Methods?
Before we dive into the “how to,” let’s chat about the “why.” Why are clip ins the superior choice for so many beauty enthusiasts?
Unlike tape ins or sew ins, which are like a committed relationship, clip ins are a summer fling. They have low commitment. You can wear them for a brunch date and take them out before you hit the gym. There is zero damage to your natural hair follicles because you aren’t using glue or heat to fuse them to your head. Plus, the versatility is unmatched. Want a high pony today and a bob tomorrow? Done.

Preparation: The Foundation of Flawless Hair
You wouldn’t build a house on a swamp, so don’t try to install clip in extensions like a pro on messy hair. Preparation is the secret sauce that separates a messy install from a red carpet look.
Tools of the Trade
To achieve that salon quality finish, you’ll need a few trusty sidekicks:
- A Soft Paddle Brush: To detangle without snapping strands.
- A Rat Tail Comb: Essential for creating those laser sharp parts.
- Sectioning Clips: To hold your natural hair out of the way (a hair tie works in a pinch, but clips are better).
- Dry Shampoo or Texturizing Spray: This is the grip your hair needs.
- A Mirror (preferably two): Seeing the back of your head is crucial.
Preparing Your Natural Wefts
Start by brushing your own hair thoroughly. Knots are the enemy here. If your hair is tangled, the clips won’t sit flat against your scalp, creating lumps and bumps that tell the world, “Hey, I’m wearing fake hair!”
Pro Tip: If your hair is freshly washed and slippery (we call this “glass hair”), the clips might slide out. Dirty hair actually holds extensions better. If you are squeaky clean, spray a little dry shampoo or hairspray at the roots to give the clips something to bite into.

Step by Step: Guide to Installing Clip In Hair Extensions
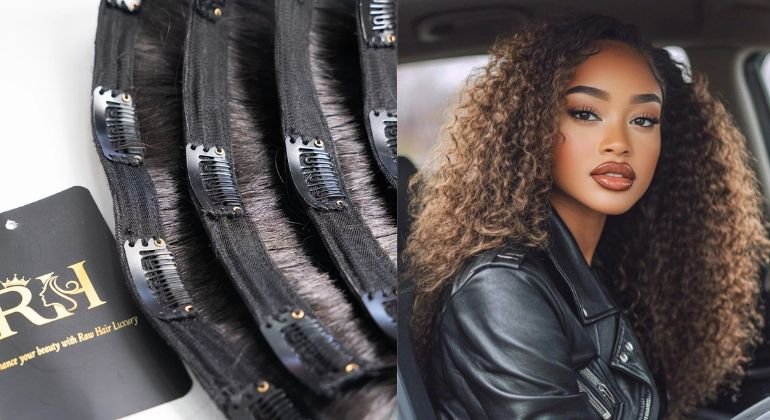
Alright, grab your extensions. It’s showtime. Most sets come with wefts of varying widths usually 1 clip, 2 clip, 3 clip, and 4 clip pieces. Lay them out on a table so you can see exactly what you’re working with.
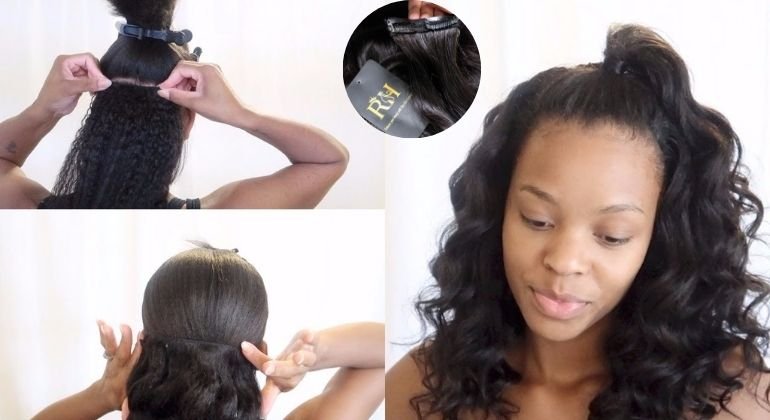
Step 1: The Nape Section (The Foundation)
Start at the bottom and work your way up. Use your rattail comb to create a clean horizontal part across the nape of your neck, about an inch or two up from your hairline. Pin the rest of your hair up and away.
Now, here is the trick to ensure security: Tease the roots. Take a small section of your natural hair where the clips will go and backcomb it gently. This creates a “nest” for the clip to anchor into.
- Select the Weft: usually a 2 clip or 3 clip weft goes here.
- Snap it Shut: Slide the combs into the teased area and snap them shut. Give it a little tug. Does it feel secure? Good.
Step 2: Building the Volume (The Mid Head)
Release your hair, and create a new horizontal part about an inch above the first weft. This spacing is vital. If you stack them too close, you lose head shape; too far apart, and you lose density.
Repeat the teasing process. This is where you will likely use your widest weft (the 4 clip piece). This piece is the heavy lifter; it provides the bulk of the length and volume.
Vital Check: Run your fingers along the back of your head. Is the weft lying flat? If it’s buckling, undo it and stretch it tighter across the head before snapping.
Step 3: The Ear to Ear Section
By now, you should be around the level of your ears. This is the widest part of your head. Use your remaining large wefts here.
When applying extensions near the ears, be careful not to clip them too close to your hairline. Why? Because if you tuck your hair behind your ears, the clips will show. Leave at least an inch of natural hair on the sides to act as a curtain, hiding the magic underneath.
Step 4: Adding Dimension to the Sides
Now that the back is looking luscious, we need to balance the front. No one wants a mullet where the back is long and the front is short.
Create a part about two inches above your ear on the side of your head. Take a 1 clip or 2 clip weft and install it here. Angle it slightly. Instead of placing it perfectly horizontal, tilt the weft so it follows the natural shape of your skull. This helps the hair fall forward, framing your face beautifully.
Step 5: The Crown (The Danger Zone)
This is where amateurs get caught. If you clip extensions too high on your head, the tracks will be visible through your natural hair, especially if the wind blows.
Stop installing wefts when you reach the “crown area.” You need a thick layer of natural hair on top to drape over everything and conceal the clips. If you run out of room but still have wefts left, leave them out. It is better to have slightly less volume than to have visible tracks.
The Art of Blending: Making It Look Natural
Congratulations, the hair is on your head! But we aren’t done yet. Right now, you might have “the shelf.” You know what I’m talking about that distinct line where your short natural hair ends and the long extensions begin. It’s the dead giveaway.
To banish the shelf, we need to blend.
Styling is Non Negotiable
You cannot just clip them in and walk out the door (unless your natural hair perfectly matches the texture and cut of the extensions, which is rare).
- Curling is King: The easiest way to blend extensions is to curl them together with your natural hair. Take a section that includes both your real hair and the extension hair, and wrap them around a curling wand together. The heat molds them into a single wave, making the transition invisible.
- Straightening Strategy: If you prefer straight hair, simply ironing them won’t always hide the blunt ends of your natural hair. You might need to curve the straightener slightly inward at the ends to tuck your natural layers into the long extensions.
The “Angle Cut” Hack
If you wear extensions daily, consider taking them to your hairstylist. Ask them to “slide cut” or layer the front of the extensions while they are on your head. This removes the heavy, boxy look and helps the fake hair flow into your real hair.
Common Mistakes That Ruin the Illusion
Even the best of us slip up. Here are a few pitfalls to avoid if you want to maintain your status as a hair goddess.
1. Installing Too Close to the Scalp
If the clips are digging into your scalp, you’ve done it wrong. It should be tight, but not painful. If there is tension, it can cause traction alopecia (hair loss) over time. Give it a millimeter of breathing room.
2. Sleeping in Clip Ins
Just don’t do it. I know you look cute, and you want to wake up looking like a princess, but the friction will cause severe tangling and can pull out your natural hair. Unclip before you hit the pillow.
3. Ignoring Color Match
Close is not good enough. If your hair is jet black and your extensions are off black, it will look noticeable in sunlight. Most brands offer color rings or sample swatches. If you have highlights, look for “balayage” or “ombre” extensions to mimic the dimension of your natural locks.
Caring for Your Investment
Clipin extensions aren’t cheap, so treat them like the investment they are. Since they aren’t attached to your scalp, they don’t receive the natural oils your own hair does. They can dry out fast.
- Wash Rarely: You only need to wash clip ins every 1520 wears. Yes, really. Unless you went to a smoky bar or used a ton of hairspray, let them be.
- Hydrate: When you do wash them, use a sulfate free shampoo and a heavy duty deep conditioner.
- Brush Gently: Start from the ends and work your way up while holding the weft at the top to prevent shedding.
Final Thoughts: Embrace Your New Alter Ego
Putting in clip in hair extensions might feel like wrestling an octopus the first time you do it. Your arms will get tired, and you might clip one in crooked. That is okay! Like winged eyeliner or walking in heels, it takes practice.
Once you master the technique of sectioning, teasing, and blending, you unlock a superpower. You can go from a bob to waist length waves in ten minutes flat. You possess the ability to add volume that defies genetics. So, grab those wefts, get in front of the mirror, and start clipping. Your dream hair is literally a snap away.
Now, go flip that hair like you mean it!
🔥Remember to visit our social media pages Hair Luxury now so you don’t miss out on the day’s deals!!!🔥
📲Phone/WhatsApp: +1 (206) 698‑5133
🛜Instagram: RAW HAIR LUXURY COMPANY
🌐Tik Tok: RAW HAIR LUXURY
📧 Email: Rawhairluxury.us
🌐Website: rawhairluxury.com