Do you dream of having voluminous, cascading locks like a red-carpet celebrity, but find yourself waiting months for your natural hair to grow? You are not alone. Clip in hair extensions are the ultimate beauty hack, offering an instant transformation without the commitment or damage associated with tape ins or bonded extensions.
However, there is a fine line between a seamless, natural look and one that looks obvious. The secret lies in the application technique. In this guide, we will walk you through exactly how to install clip in hair extensions using the methods professional stylists swear by. Whether you have fine strands or thick locks, these tips will ensure your hair looks flawless.
1. Why Clip Ins Are the Ultimate Hair Hack
Before we dive into the installation process, it is important to understand why this method is superior for many. Unlike semi-permanent options, clip ins allow you to switch up your look daily. They are versatile, damage-free, and perfect for special occasions or everyday wear.
For those struggling with lack of volume, thin hair clip in extensions are a game-changer. They provide the necessary density to hold styles like beach waves or bulky braids that natural thin hair simply cannot sustain.
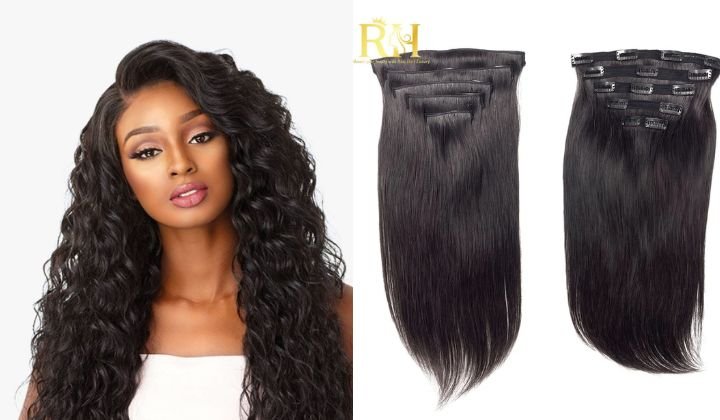
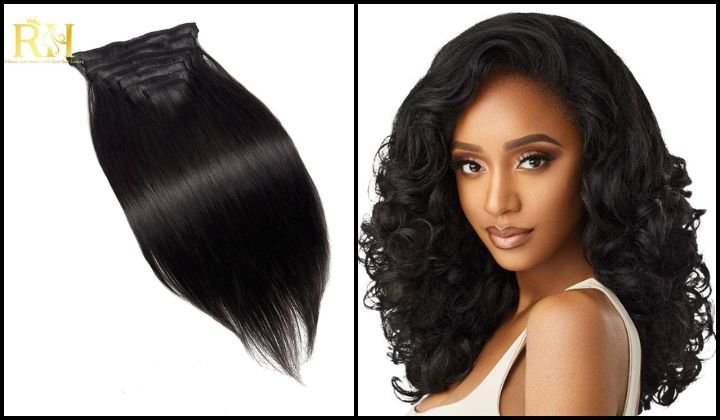
2. Choosing Your Weapon: The Best Clip In Human Hair Extensions
Half the battle is won before you even open the box. If you want a result that looks like it grew from your scalp, quality is non-negotiable. Stylists always recommend investing in the best clip in human hair extensions rather than synthetic alternatives.
Why Human Hair?
- Texture Blending: Human hair (specifically Remy hair, where the cuticles are aligned) reflects light exactly like your own hair. Synthetic hair often has an unnatural, plastic shine.
- Heat Styling: You can curl, straighten, and blow-dry human hair extensions. Synthetic fibers will melt or frizz under heat.
- Longevity: With proper care, human hair extensions can last up to a year, making them a better long-term investment.
Pro Tip: Pay attention to the weight (grams). If you have fine hair, a 120g set is usually sufficient. If you have thick hair or a blunt cut, you may need a 160g to 220g set to ensure a seamless blend.
3. Preparation: The Pro Stylist’s Secret
You cannot just snap them in and go. Proper preparation ensures the clips stay secure all day and do not slip, which is the number one fear for beginners.
Tools You Will Need:
- A rat-tail comb (for precise sectioning).
- Sectioning clips (crocodile clips work best).
- A paddle brush or loop brush.
- Hairspray or texturizing spray (essential for grip).
- A mirror (ideally a setup where you can see the back of your head).
Prep Your Natural Hair:
Start with clean, dry hair. While dirty hair has more grit, oily hair can cause clips to slide. Detangle your hair thoroughly to create a smooth canvas.
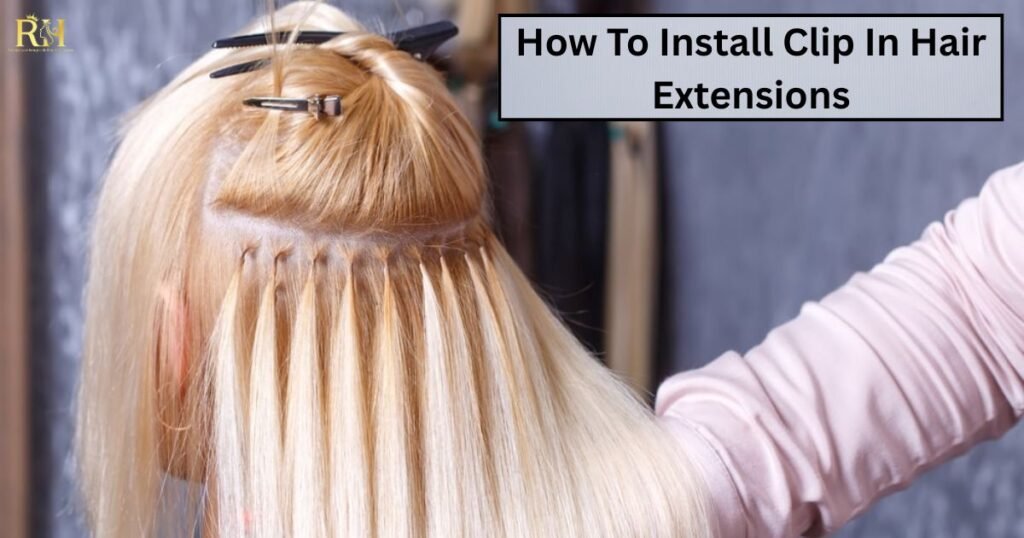
4. How to Install Clip In Hair Extensions: Step-by-Step Guide
Follow this roadmap to achieve a salon-quality application at home.
Step 1: The Nape Section
Start at the bottom of your head. Use your rat-tail comb to create a clean horizontal part about an inch or two above your hairline at the nape of your neck. Clip the rest of your hair up and away.
- Note: Do not clip the extensions too low, or they will show when you move your neck.
Step 2: Create the Anchor (Crucial Step)
This is the most important step for learning how to install clip in hair extensions securely.
- Take a small section of your natural hair where the clip will sit.
- Tease/Backcomb: Gently tease the roots with your comb.
- Spray: Spritz the teased area with a little hairspray. This creates a “shelf” or anchor for the clip to grip onto, preventing slippage.
Step 3: Apply the First Weft
Select the shortest weft (usually 2 or 3 clips). Open all the clips on the weft.
- Secure the middle clip first into the teased area near the roots.
- Pull the weft slightly taut (but not tight) and snap the side clips closed.
- Ensure the weft lays flat against the head. If there are bumps, undo and re-clip.
Step 4: Work Your Way Up
Release a layer of your natural hair to cover the first weft. Create a new horizontal part about 1 inch above the previous one.
- Repeat the “Tease and Spray” method.
- Select a wider weft (3 or 4 clips) and install it.
- Stylist Tip: Stacking wefts too close together limits movement. Leave enough natural hair between rows for a free-flowing look.
Step 5: The “Safe Zone”
Stop adding wefts when you reach the “Safe Zone.” This is usually the area around the crown of your head (aligned with your eyebrows). You need enough natural hair on top to completely cover the extension tracks. If you clip them too high, the tracks will be visible in the wind or under bright lights.
Step 6: Mastering the Sides
The sides of the head are trickier because there is less hair to hide the clips.
- Use the smaller wefts (1 or 2 clips).
- Diagonal Placement: Instead of clipping them horizontally, angle the wefts diagonally upward, following your hairline towards the crown. This technique frames the face beautifully and allows you to tuck your hair behind your ears without revealing the clips.
5. Tips for Thin Hair Clip In Extensions
If you have fine or thin hair, the standard application might feel bulky or heavy. Here is how to adapt:
- The Sandwich Rule: You do not have to use every weft in the box. Using too many wefts on thin hair can look unnatural (the “mushroom” effect). Use just enough to add volume and length.
- Strategic Teasing: Teasing is non-negotiable for thin hair clip in extensions. Fine hair is slippery; without the backcombing, the clips will slide out within hours.
- Root Spray: Use a colored root spray or dry shampoo on the tracks if the extension band color is slightly different from your roots. This helps camouflage the weft.
6. Blending the Hair
Once all clips are installed, you might notice a separation between your natural hair and the extensions. To fix this:
- Curl It Together: The best way to blend extensions is to curl your natural hair with the extension hair. Taking a section that includes both and curling them together marries the textures perfectly.
- Angled Trimming: If you plan to wear them straight, you may need a professional stylist to “slide cut” or layer the front pieces of the extensions so they connect with your natural layers.
7. How to Maintain Clip In Hair Extensions
You have invested in the best clip in human hair extensions, so you need to protect that investment. Proper maintenance can double the lifespan of your hair.
Washing
Unlike your natural hair, extensions do not receive oils from your scalp. Therefore, they do not need to be washed often.
- Frequency: Wash them only every 15 to 20 wears, or when there is too much product buildup.
- Technique: Use a sulfate-free shampoo. Do not rub or bunch the hair. Gently squeeze the shampoo through the hair in a downward motion.
- Hydration is Key: Follow with a deep conditioner or hair mask. Leave it on for 10-20 minutes to restore moisture.
Brushing
Always be gentle. Use a wide-tooth comb or a loop brush designed for extensions.
- Start brushing from the bottom ends and slowly work your way up to the clips.
- Never brush the hair when it is wet, as this is when it is most fragile.
Storage
When not in use, do not throw them in a drawer. Close all the clips, brush them out, and store them in a silk bag or a dedicated extension box. This prevents tangling and keeps the hair smooth for your next use.
Conclusion
Learning how to install clip in hair extensions is a skill that takes a little practice, but the results are undeniably worth it. By following these professional steps—prepping your roots, placing wefts strategically, and blending properly—you can achieve a luxurious, voluminous look that boosts your confidence instantly.
Remember, whether you are using thin hair clip in extensions for a subtle boost or a full set for dramatic length, the goal is to make you feel like the best version of yourself. Treat your hair well, learn how to maintain clip in hair extensions correctly, and enjoy your stunning new look!
🔥Remember to visit our social media pages Hair Luxury now so you don’t miss out on the day’s deals!!!🔥
📲Phone/WhatsApp: +1 (206) 698‑5133
🛜Instagram: RAW HAIR LUXURY COMPANY
🌐TikTok: RAW HAIR LUXURY
📧 Email: Rawhairluxury.us
🌐Website: rawhairluxury.com