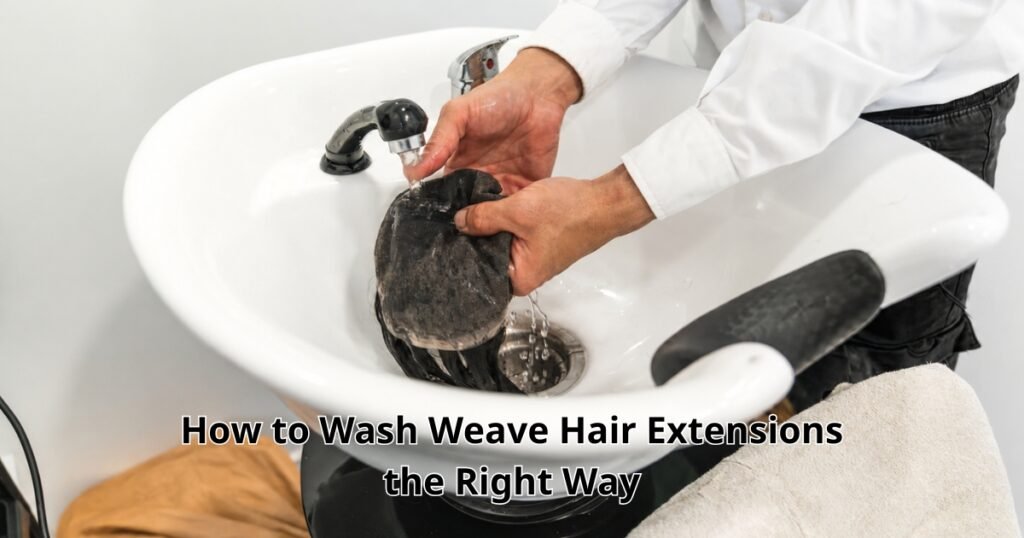
Washing a weave is not the same as washing your natural hair, and treating it that way is one of the fastest ways to shorten its lifespan. Once a weave is sewn, taped, or clipped in, it no longer receives natural oils from your scalp the way it once did, and the wefts themselves are more vulnerable to tangling, matting, and even mold if washed or dried incorrectly.
This guide walks through exactly how to wash weave hair extensions step by step, including the techniques that differ depending on whether you have a sew-in, a closure, a tape-in, or clip-ins, along with the drying and aftercare habits that keep your weave looking salon-fresh for its entire wear period.
Why Washing a Weave Requires a Different Approach
Natural hair benefits from sebum produced at the scalp, which travels down the hair shaft and provides ongoing conditioning. Weave hair extensions, even high-quality virgin or Remy human hair, are permanently cut off from that supply. This means moisture has to be added intentionally every time you wash, and the wrong technique can dry out, tangle, or weaken the wefts far faster than it would your natural hair.
It’s also worth noting that a sew-in weave creates a partially enclosed environment between your scalp and the wefts. Without proper washing and, critically, proper drying, this enclosed space can trap moisture against the scalp for extended periods a genuine risk factor for mold and mildew growth that’s rarely mentioned in basic washing guides, but one that dermatologists and trichologists take seriously.
Step 1: Detangle Before You Wash – Never After
This is the step most guides skip, and it’s arguably the most important one. Washing tangled hair causes knots to tighten under water pressure and product, turning a five-minute detangling job into a painful, breakage-prone ordeal afterward.
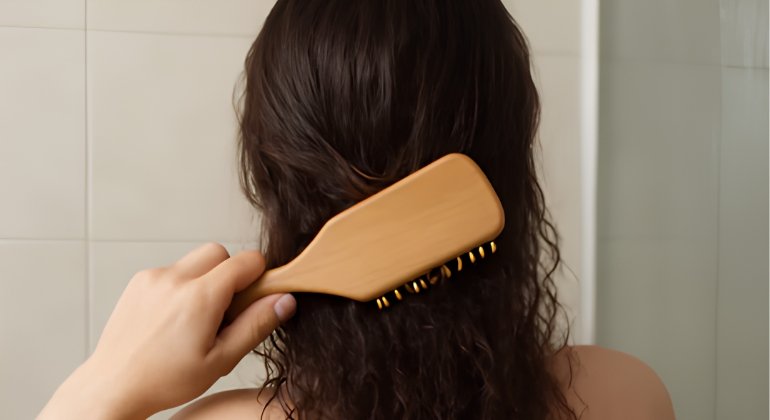
Before any water touches your weave, use a wide-tooth comb or detangling brush to gently work through knots, starting at the ends and working upward toward the roots. Pay particular attention to the nape area, where friction from clothing and pillows causes the most tangling between washes.
Step 2: Choose the Right Water Temperature

Contrary to some advice circulating online, the safest approach for nearly all weave hair extensions is lukewarm to cool water rather than hot water regardless of scalp type. Hot water lifts the hair’s cuticle layer, which accelerates moisture loss, fades color treatments faster, and can weaken the bonds in tape-in or glue-based installs over repeated washes. Lukewarm water cleans effectively without these downsides, and a final cool rinse helps seal the cuticle for added shine.
Step 3: Apply Shampoo With the Right Technique
Use a sulfate-free shampoo and apply it primarily to the scalp and roots, where oil and product buildup actually accumulate, rather than aggressively scrubbing the full length of the wefts. Gently massage the scalp with your fingertips never your nails to lift away sweat, dust, and natural oil without tugging on the braided foundation beneath a sew-in.
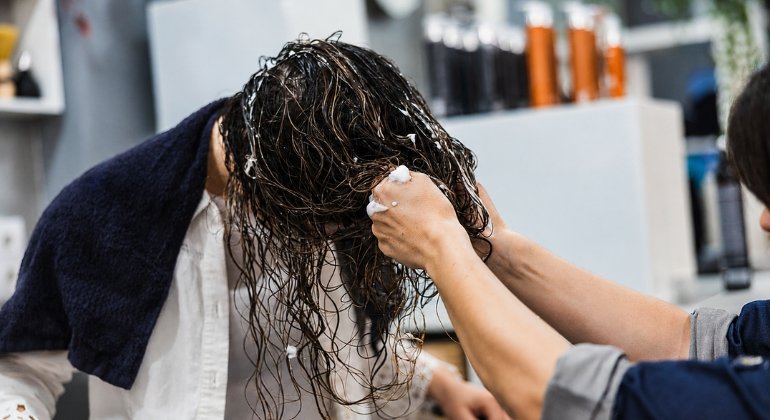
Let the shampoo run down through the rest of the hair as you rinse rather than scrubbing it vigorously through the lengths, since this reduces unnecessary friction on the weft itself.
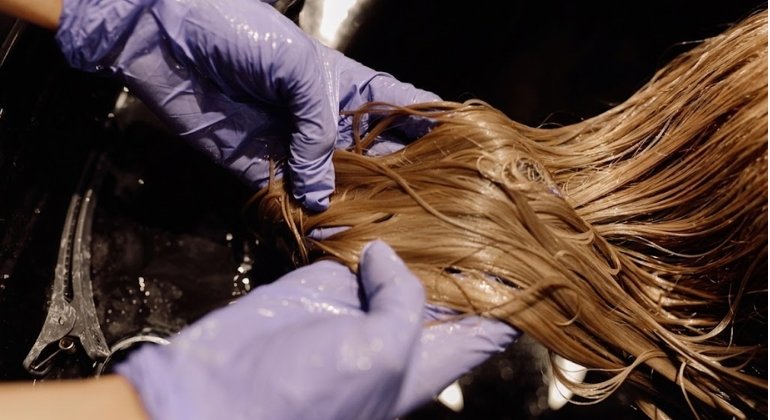
Step 4: Condition the Mid-Lengths and Ends, Not the Roots
Weave hair extensions need conditioner most at the mid-lengths and ends, where dryness accumulates fastest. Apply conditioner starting a couple of inches from the roots and working down, avoiding the weft tracks and scalp directly, since buildup at the root area can lead to a heavier, greasier feel and, over time, contribute to unpleasant odor.

Leave the conditioner on for two to three minutes to allow it to penetrate, then rinse thoroughly. Residual conditioner left in the hair is one of the most common causes of weave hair looking dull and feeling weighed down within just a few days of washing.
How Often Should You Wash Weave Hair Extensions?
Most trichologists and stylists recommend washing weave hair extensions every one to two weeks, though the right frequency depends on a few personal factors:
People with oilier scalps or higher sweat production from frequent exercise may need to wash slightly more often, closer to once a week, to prevent buildup and odor. People with drier scalps can often stretch washes to every two weeks without issue, supplementing with a dry shampoo for the scalp between full washes. Anyone using heavy styling products, such as edge control or gel, should wash sooner to prevent product buildup, which left unaddressed can clog the scalp and weaken the hair over time.
Washing too frequently strips natural oils from your real scalp, which can ironically increase oil production as your scalp overcompensates so more frequent isn’t always better.
Choosing the Right Shampoo for Your Weave Type
For virgin or Remy human hair weaves with no chemical processing, most gentle shampoos work well. A sulfate-containing formula is fine occasionally for a deeper clean if you have an oilier scalp, but a sulfate-free option used most of the time will preserve moisture better over the long term.
For colored or bleached weaves, particularly blonde or balayage installs, use a color-safe, sulfate-free shampoo, and incorporate a purple or blue-toned shampoo periodically to counteract brassiness, since lightened hair fibers oxidize and shift tone faster without scalp oils to buffer the process.
For low-porosity hair textures, look for lightweight, water-based formulas, since heavier creams and butters tend to sit on top of low-porosity strands rather than absorbing, leading to buildup and limp-looking results.
The Bottom Line on Washing Weave Hair Extensions
A weave can look just as fresh on week six as it did on day one if you wash it with intention rather than habit. The fundamentals are simple: detangle before you wash, use lukewarm water, focus shampoo at the scalp and conditioner at the ends, adjust your technique to your specific install type, and dry thoroughly especially at the scalp for sew-ins before going about your day or going to sleep.
Get these habits right consistently, and your weave will reward you with longer-lasting shine, fewer tangles, and a much longer overall lifespan.
Ready to give your hair the care it deserves? Contact us today for personalized weave care recommendations and an exclusive discount on your next order of premium, easy-to-maintain human hair weaves.
📲Phone/WhatsApp: +1 (206) 698‑5133
🛜Instagram: RAW HAIR LUXURY COMPANY
🌐Tik Tok: RAW HAIR LUXURY
📧 Email: Rawhairluxury.us
🌐Website: rawhairluxury.com